Top 7 Kids’ Playroom Decor Tips to Boost Learning, Imagination, and Calm

Introduction: make the playroom actually work (and not just look cute)

Looking for Top 7 Kids’ Playroom Decor Tips to Boost Learning, Imagination, and Calm right off the bat? You landed in the right place. I like to keep playrooms both playful and purposeful, so you get a space where kids learn, imagine, and actually calm down sometimes — yes, really. According to my experience, the best playroom decor tips focus on layout, storage, sensory balance, and a few smart tricks that save your sanity.

Ever walked into a “cute” playroom and wondered why your kid still dumps every toy on the floor? Me too. In my opinion, design should support behavior, not just aesthetics. I’ll walk you through practical, kid-tested ideas that I prefer when styling playrooms for families who want creativity and calm in equal measure.

Tip 1: Zone the room for focused play and calm

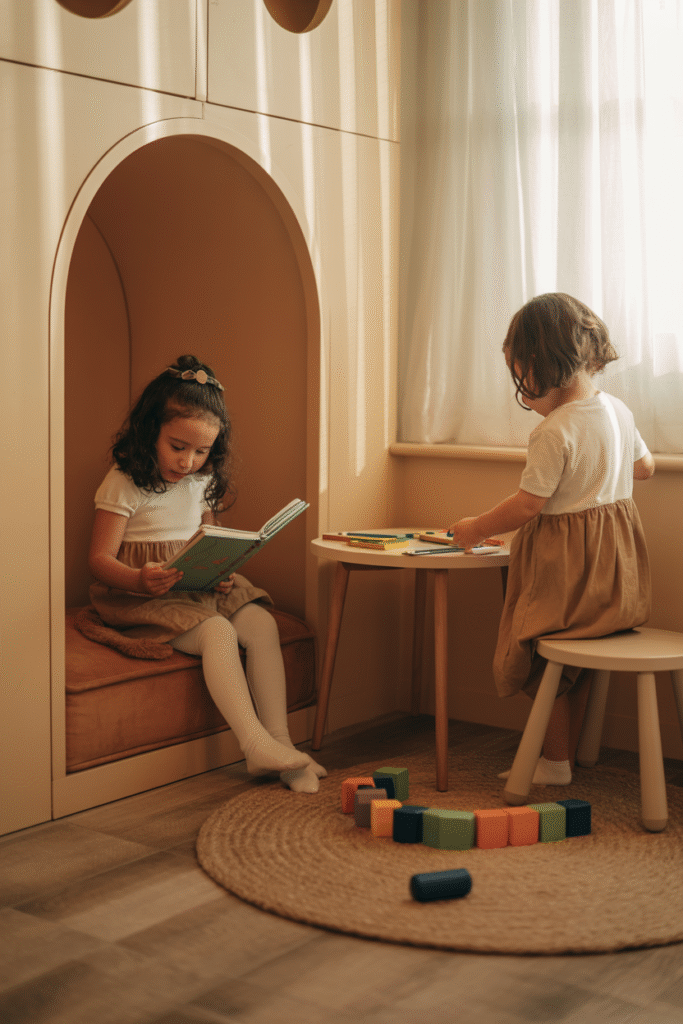
Kids need structure, even if they resist it loudly. Zoning gives the room purpose and helps children know where to read, build, or get noisy. I recommend creating at least three distinct zones: a creative zone, a quiet/reading zone, and an active play zone.

Why zoning matters

Zoning reduces overwhelm. When toys and activities have a “home,” kids shift more easily between activities. Have you noticed how a clearly defined reading nook makes kids more likely to sit and actually read? I have, repeatedly.

How to set up effective zones

  • Creative zone: small table, washable surface, art storage within reach. I prefer low tables so kids can climb in and out without help.
  • Quiet/reading zone: soft rug, bean bag or low bench, good lighting, a small bookshelf. Soft textures invite calm.
  • Active play zone: open floor space, activity mats, a small indoor tent or playhouse. Keep this area away from fragile decor.

Quick setup checklist I use with clients

  • Place zones so they flow logically, not in a strict grid.
  • Use area rugs or low shelving to visually separate zones without blocking sightlines.
  • Keep high-energy toys in one bucket or basket so you can contain the chaos quickly.

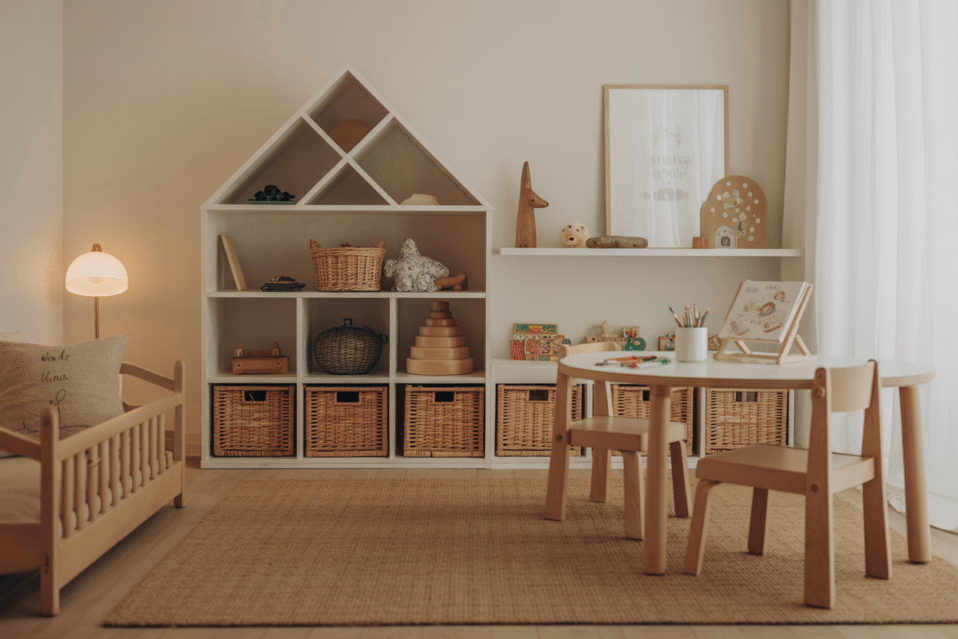
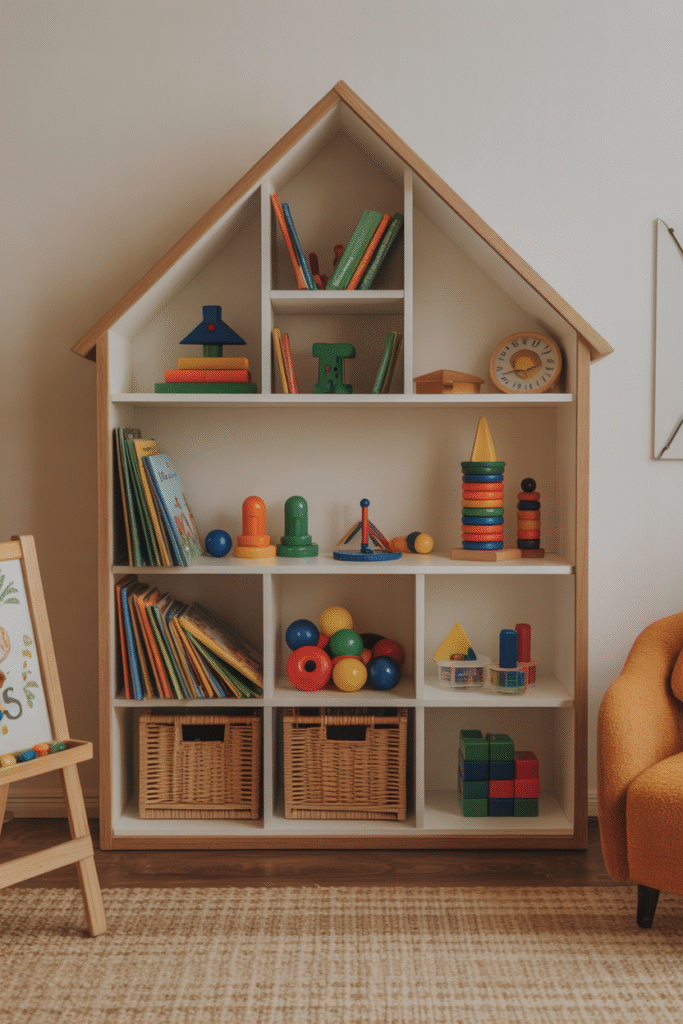
Tip 2: Make storage simple, reachable, and stylish

Storage wins the day. I recommend storage that kids can use independently. When storage looks like furniture instead of glorified plastic bins, the room feels calmer and you stop yelling “put it away” every five minutes.

Best storage types for real families

  • Open bins and baskets on low shelves for frequently used toys. Kids can see and choose what they want.
  • Labelled drawers or boxes (use pictures for pre-readers). I use clear bins for puzzles and opaque boxes for craft supplies. Both work if you keep labeling consistent.
  • Multi-functional furniture like ottomans with storage or benches with lift-up seats. These pieces hide clutter and double as seating.

Toy rotation: less clutter, more play

I recommend rotating toys every 2 to 3 weeks. Put half the toys away in labeled bins and swap them out. Toy rotation keeps interest high and reduces mess.

How I run a rotation system:

  1. Sort toys into categories: building, pretend, sensory, and books.
  2. Store extras in clear bins labeled by category and keep them on a top shelf or closet.
  3. Swap a bin into the playroom weekly or biweekly. Kids treat rotated toys like new finds.

Practical storage tips I swear by

  • Keep daily-use toys at child height. Independence reduces frustration.
  • Use uniform baskets to create visual calm. I prefer natural woven baskets for texture.
  • Install a low hooks rail for dress-up clothes to encourage responsibility.

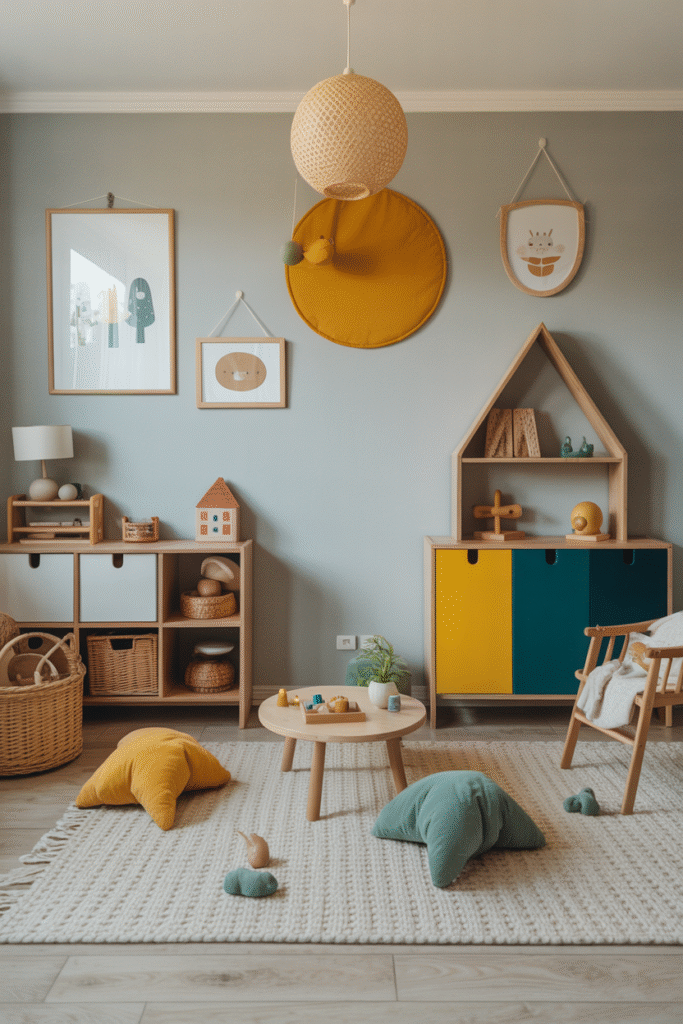
Tip 3: Choose calming colors with playful pops

Color affects mood more than most parents realize. I always recommend a calm base with controlled pops of color to spark imagination without overstimulating.

The palette strategy I use

  • Pick a neutral or muted base for walls and large furniture. Beige, warm white, or soft gray creates a calm backdrop.
  • Add one or two bright accent colors through cushions, art, or a single statement wall. I like mustard yellow for energy or teal for a creative vibe.
  • Use natural wood and soft textures to warm up the palette.

Why this works

Kids respond to contrast. A calm background lets colorful toys and artwork shine. Would you rather be in a room that screams for attention or one that invites focused play? I prefer the latter, every time.

Quick color-do list

  • Paint the ceiling a lighter shade than the walls for a cozier feel.
  • Choose washable paint for easy cleanup. I recommend satin finishes in play areas.
  • Limit wall decals to one statement area so walls don’t get visually noisy.

Tip 4: Add sensory-friendly elements to support focus and emotional regulation

A good playroom isn’t just about toys — it’s about how the space makes kids feel. Sensory design plays a huge role in helping children calm down, focus better, and enjoy their playtime without getting overstimulated.

Why sensory elements matter

Kids are naturally sensory-seeking, and the right setup can actually guide that energy instead of letting it spiral into chaos. I’ve noticed that when a playroom includes even two or three soothing sensory features, kids settle in faster and meltdowns decrease.

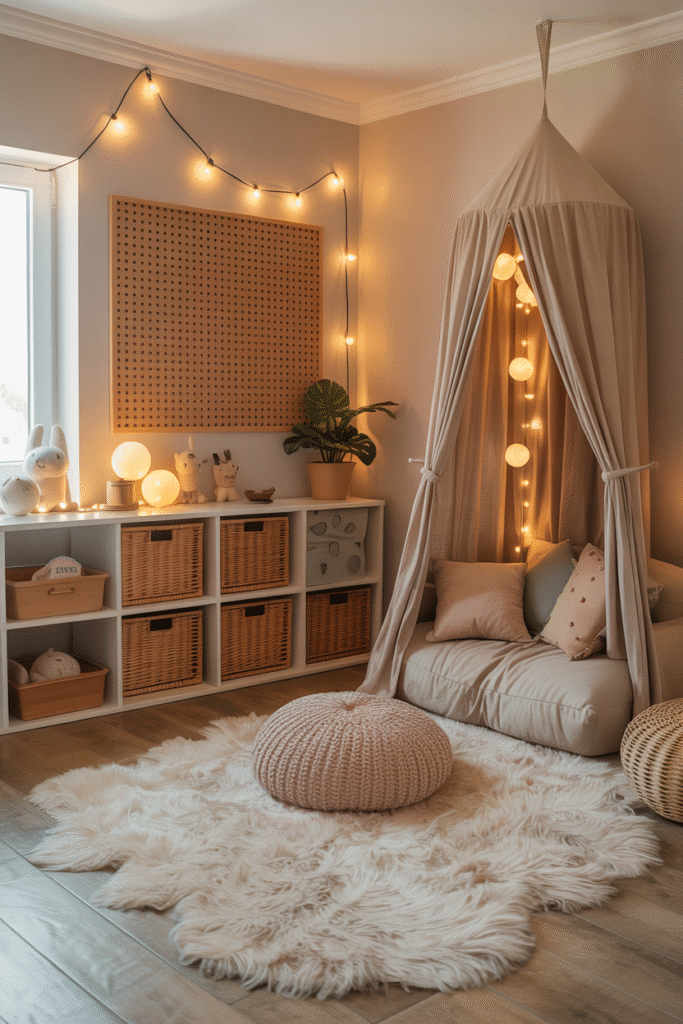
My favorite sensory-friendly additions

  • Soft textures: Think plush rugs, knit poufs, and soft cushions. They create a grounding effect.
  • A mini sensory corner: A small canopy with pillows, a weighted blanket, or a tactile wall panel. This becomes the “calm down” spot.
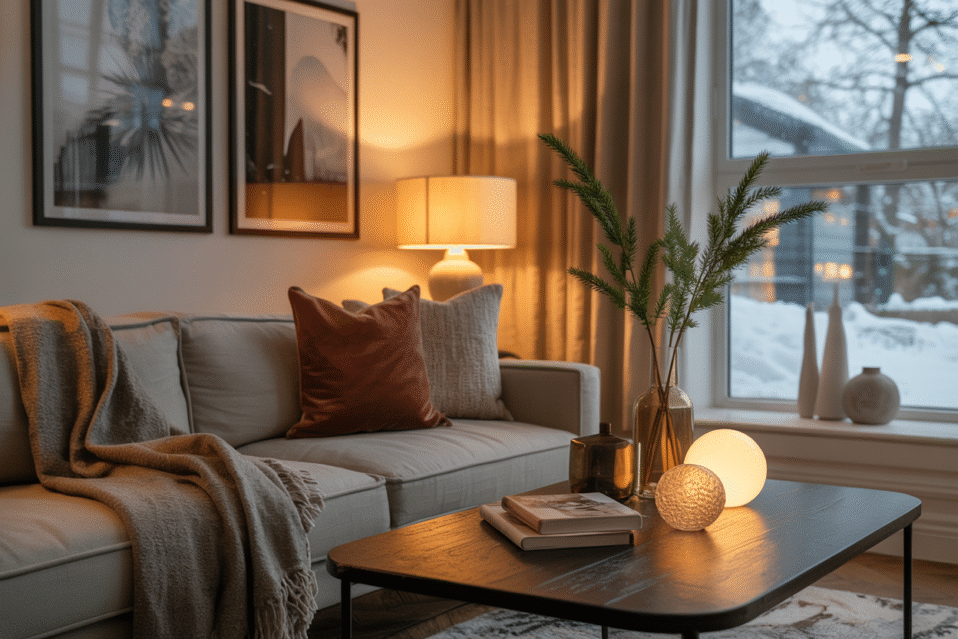
  • Gentle lighting: String lights, warm lamps, or dimmable LEDs. Bright overhead lights often overstimulate kids.
  • Sensory bins: Rotating bins with rice, beans, water beads (supervised), or kinetic sand keep curiosity high.

Quick sensory-balancing tips I rely on

  • Avoid loud, buzzing LED toys in the reading/quiet zone.
  • Add one tactile activity per zone so kids get a little sensory input everywhere.
  • Keep textures consistent — too much variety becomes distracting rather than soothing.

Tip 5: Choose flexible furniture that grows with your child

Playrooms evolve quickly. What works at age 3 won’t work at age 7, so I always prefer adjustable, lightweight, or modular furniture that keeps up with growth spurts and changing interests.

Why flexible furniture is worth the investment

I’ve seen families re-buy entire playrooms just because the furniture was too “babyish” or too rigid. A few flexible pieces fix that problem. Plus, movable furniture means you can reconfigure the layout as your child’s needs change.

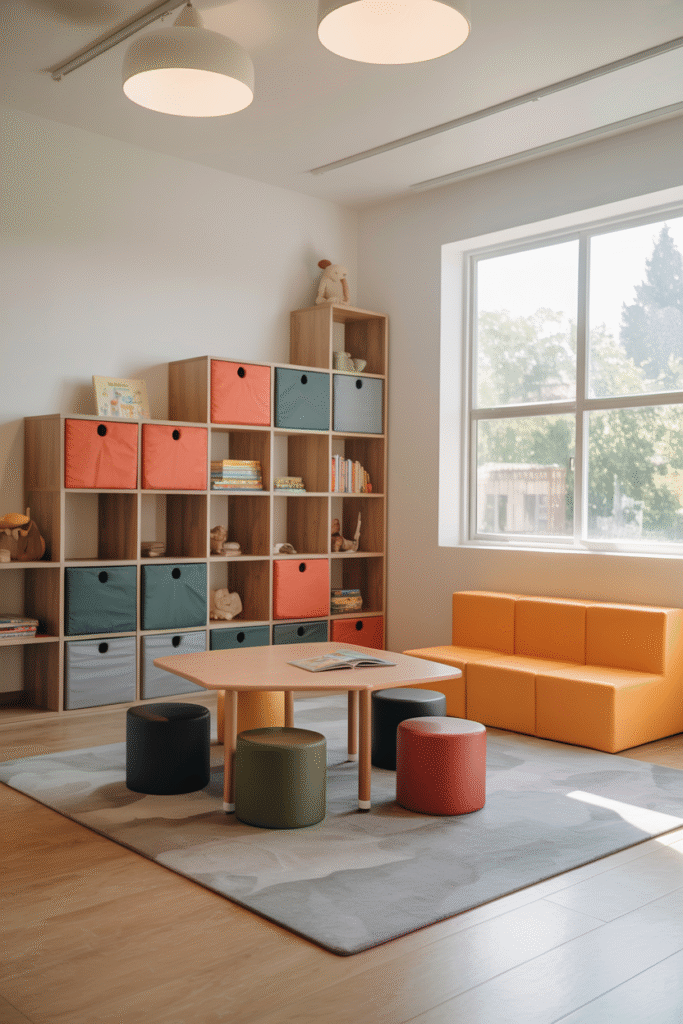
What I recommend for a future-proof playroom

  • Modular shelves that can be stacked, separated, or turned into reading benches.
  • Adjustable-height tables for arts, crafts, and early homework.
  • Lightweight seating like foam sofas, stackable stools, or poufs kids can drag around.
  • Foldable mats for tumbling, building forts, or active play.

My quick “furniture planning” checklist

  • Keep pathways open so kids can move safely.
  • Choose rounded edges whenever possible — trust me, your shins will thank you.
  • Pick materials that are wipeable and durable. Kids will test the limits.

Tip 6: Create learning corners that spark curiosity

A playroom should feel like an invitation to learn — not a mini classroom that stresses kids out. I prefer learning corners that blend education with fun, making the space feel exciting and discovery-driven.

Why learning corners help

Kids engage more when learning doesn’t feel forced. Setting up small “micro-learning zones” encourages natural exploration and curiosity. In my experience, kids end up spending more time reading, building, and experimenting when those spaces are intentionally designed.

Simple learning corners to add

  • Reading corner: A tiny cozy nook with a rotating mini-library.
  • STEM corner: Building blocks, magnets, gears, simple puzzles, and science kits.
  • Art corner: Easel, coloring supplies, paints (washable!), and paper storage.
  • Pretend-play corner: A mini kitchen, toolkit, or doctor set.

My setup tips for learning zones

  • Keep shelves low so kids can choose what interests them.
  • Display a few items at a time instead of stuffing shelves—it boosts engagement.
  • Use art clips or a mini cork board to display kids’ creations proudly.

Tip 7: Use playful organization hacks that encourage independence

If you’ve ever spent half your day picking up toys, this tip is for you. I love using playful organization tricks that make cleanup fun and clearly show kids what goes where.

Why playful organization works

Kids respond to visuals and routines. When storage is clear and appealing, they naturally take responsibility — or, at the very least, need fewer reminders.

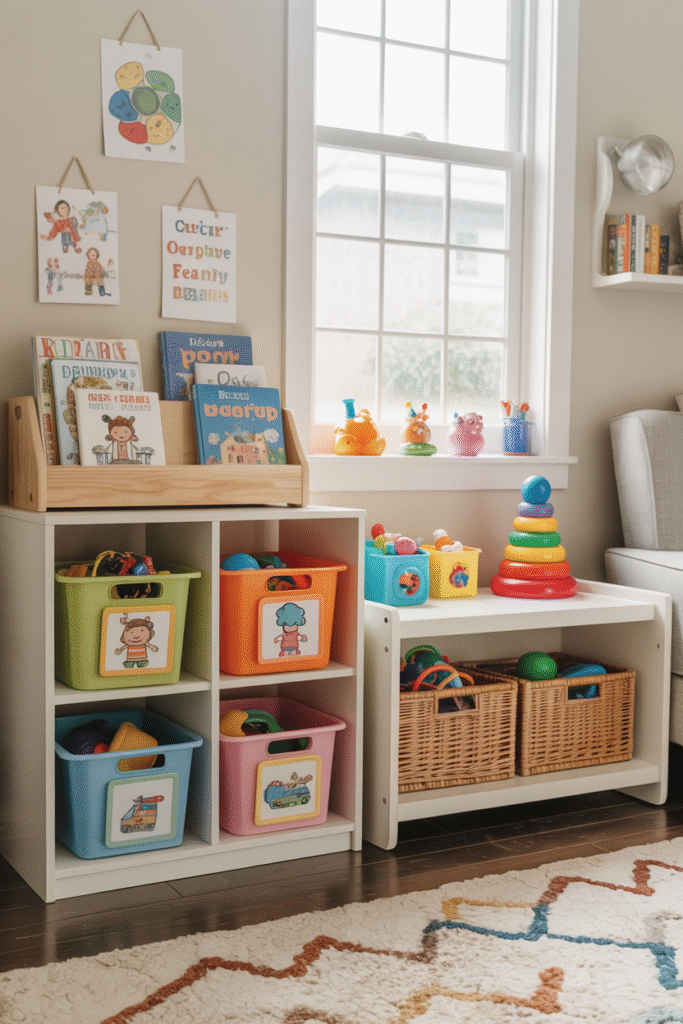
Organization hacks I swear by

  • Color-coded baskets: Blue for blocks, yellow for cars, green for art supplies.
  • Picture labels for non-readers. A simple printed photo works wonders.
  • “One big bin” rule: Keep a single oversized basket for quick-cleanup days.
  • Book display racks: Forward-facing shelves encourage kids to pick books independently.

Make cleanup enjoyable

  • Put on a 2-minute cleanup song — works like a charm.
  • Use baskets with handles so kids can carry them around.
  • Turn cleanup into “sorting games” for younger kids.

Final Thoughts: A playroom that truly works

You now have all 7 playroom decor tips that boost learning, spark imagination, and help kids feel calmer — from zoning to storage to sensory elements and independence-based organization.

The whole goal is to create a space where kids can grow, explore, and feel at ease — while you enjoy a room that’s both beautiful and functional.

8 Trending Winter Decor Ideas For 2026

Introduction — quick, cozy, and useful

Looking to refresh your home for the cold season? 8 Trending Winter Decor Ideas For 2026 will give you the fresh, cozy, and modern directions I actually use with clients. In my opinion, winter decor should feel intentional, not like a last-minute raid of throw blankets and fairy lights. Do you want warmth that looks curated rather than cluttered? Good. I like to focus on pieces that pull double duty: beautiful and functional.

I write from four years of hands-on interior design experience, and according to my experience, the biggest winter wins come from texture, layered lighting, thoughtful scents, and small natural touches. I recommend keeping things simple but deliberate. Ready for the first batch of ideas? Let’s start with the ones I’ve used most and loved seeing come to life.

Idea 1 — Luxe Layers: Textures that hug you

Ever walked into a room and felt hugged by the decor? That feeling comes from layers. I prefer mixing textures to create depth and warmth.

What to layer and why

  • Throws and blankets: Use at least two different textures — a chunky knit and a soft faux fur. I like to toss the knit at the end of the sofa and fold the fur over the arm for contrast.
  • Pillows: Combine smooth linen, velvet, and a faux shearling. Velvet adds luxury; shearling adds that cuddly winter vibe.
  • Rugs: Layer a low-pile jute or sisal with a soft wool rug on top for both insulation and visual interest.

Quick tips I always give clients

  • Stick to a palette of 2–3 base colors and add neutrals as anchors. I recommend earthy tones—warm taupe, deep olive, muted rust.
  • Keep scale in mind: pair large chunky knits with smaller patterned pillows so the eye rests comfortably.
  • Textures beat patterns in winter. Patterns can work, but texture carries the seasonal warmth better.

Idea 2 — Warm Minimalism: Clean lines + cozy materials

Minimalism doesn’t have to feel cold. I like to call this warm minimalism — you keep clean shapes but swap cold surfaces for tactile, warm finishes.

How to do warm minimalism without being boring

  • Choose furniture with simple silhouettes and use warm materials like oiled wood, brushed brass, or matte terracotta. I recommend oak or walnut for coffee tables and sideboards.
  • Limit decor items to a few meaningful pieces. I tell clients: one beautiful bowl, one art piece, and a selection of books. Less clutter equals more calm.
  • Add softness through wool throws or a sheepskin rug. These small additions humanize a minimalist space.

My rule of thumb

I prefer investing in one statement textile rather than many small cheap ones. A well-made wool blanket will last years and instantly lift the whole room. Would you rather buy five cheap throws that look tired in six months or one quality piece that ages beautifully?

Idea 3 — Ambient Lighting Layers: Mood matters

Lighting makes or breaks the winter mood. I always tell people: light the room like you would a restaurant you love.

The three-layer lighting method I use

  1. Ambient lighting: a central fixture or recessed lights for general brightness. I recommend dimmable options every time.
  2. Task lighting: reading lamps and kitchen under-cabinet lights. I like adjustable swing-arm lamps next to a cozy chair.
  3. Accent lighting: candles, string lights, or a small table lamp to create pockets of warmth.

Practical lighting tips

  • Use warm bulbs with a color temperature around 2700K. I prefer warm light because it flatters skin tones and fabrics.
  • Install dimmers so you can shift the mood instantly. I recommend dimmers on both living room and bedroom circuits for maximum control.
  • Place lights at different heights to avoid flat lighting. Low lamps and high ceiling fixtures work together to create depth.

Idea 4 — Hearth Without a Fireplace: Create a focal warmth

No fireplace? No problem. I like creating a focal warmth using curated elements that mimic the hearth vibe.

Ways I fake a cozy hearth

  • Group candles on a tray with mirrors behind them to multiply the glow. I recommend unscented beeswax candles for a natural, clean burn.
  • Use an electric fireplace panel or a stylish firebox console for instant visual warmth without the maintenance. I often suggest these for apartments.
  • Design a warm vignette: stack a few firewood logs (real or decorative), add a small lantern, and place a textured throw nearby. That small cluster reads like a hearth.

Why this works

People crave a gathering point. Creating a warm focal spot encourages people to linger. I notice guests naturally gravitate toward a well-styled hearth area, even if it’s faux.

Idea 5: Nature Indoors — organic warmth that never fails

I always say winter decor needs at least a little nature because the outdoors looks gloomy enough already. Bringing natural elements inside creates instant balance. Have you ever noticed how one simple branch arrangement makes a whole room feel fresher? According to my experience, nature-inspired decor always softens the winter heaviness.

Easy ways to add organic elements

  • Dried branches or winter greenery: I prefer eucalyptus, pine, or simple bare branches. They last forever and look effortlessly chic.
  • Natural materials: Add bowls, trays, or candleholders made of stone, wood, or clay. These add weight and grounding to the space.
  • Winter botanicals: I recommend subtle fragrant elements like cinnamon sticks or dried oranges for a cozy aroma that doesn’t scream potpourri.

Why this trend works for 2026

People lean toward earthy, grounded spaces, especially with winter’s darker days. Natural textures add life without adding clutter. In my opinion, a single vase of branches can do more for a room than five trendy decor pieces.

Idea 6: Moody Color Palettes — deep, dramatic, and cozy

Every year, winter palettes shift slightly, but 2026 leans toward rich, moody tones. I love this trend because it instantly makes a room feel like a warm, stylish cave you never want to leave. Have you ever painted a wall and felt like it suddenly wrapped you in a blanket? That’s the moody palette effect.

2026 favorite winter colors I recommend

  • Deep forest green
  • Chocolate brown
  • Muted plum
  • Charcoal gray
  • Smoky navy

These colors add personality without feeling loud. I prefer using them on accent walls, throw pillows, or large furniture pieces like accent chairs.

How to keep moody palettes from feeling heavy

  • Mix deep colors with lighter neutrals like warm white or beige.
  • Add metallic accents such as brushed gold or warm brass for contrast.
  • Use strategic lighting because dark colors absorb light quickly.
  • Introduce soft textures like velvet or wool to keep everything inviting.

In my opinion, moody winter shades make a home look intentionally styled rather than strictly seasonal.

Idea 7: Scented Atmosphere — your home should smell like winter

I always say a winter home doesn’t just look cozy; it smells cozy. And yes, I’ve walked into homes where everything looked stunning but smelled like someone just boiled broccoli. Not ideal. According to my experience, winter decor feels incomplete without scent layering.

My go-to winter scents

  • Vanilla and cedar
  • Fir and amber
  • Cinnamon and clove
  • Tobacco and honey
  • Spiced orange

These scents gently remind you of winter without feeling like a cinnamon explosion. I prefer using reed diffusers in common areas and candles in more intimate spaces.

How to create layered scents

  • Use a base scent in diffusers so your home always smells subtly pleasant.
  • Add scented candles for evening coziness.
  • Use linen sprays for blankets or curtains to refresh the room quickly.
  • Keep scents consistent so your home feels intentionally curated rather than chaotic.

Ever wondered why hotels always smell great? They pick one subtle scent and let it do the heavy lifting.

Idea 8: Multi-functional Decor — smart and stylish

Winter decor gets tricky because people usually add too many items without realizing they’re cluttering their space. I recommend focusing on decor that serves a purpose. According to my experience, multi-functional pieces help your home feel cozy without overwhelming every corner.

Smart winter picks I personally use

  • Ottomans with storage: perfect for blankets and extra winter accessories.
  • Side tables with built-in shelves: great for books, candles, and small baskets.
  • Cozy floor cushions: decorative during the day, extra seating when guests visit.
  • Weighted blankets: a decor item that actually helps you sleep better.

Why multi-functional decor works

Everyone wants a cozy winter home, but no one wants clutter. These pieces add beauty and practicality. Plus, they help small apartments feel organized and larger homes feel intentional. Ever bought a pretty decor piece and watched it gather dust? Multi-functional items eliminate that guilt.

Conclusion

As you get your home ready for the colder months, these 8 Trending Winter Decor Ideas For 2026 can help you build a space that feels warm, intentional, and stylish without losing your personality. In my opinion, winter decor works best when you mix comfort with creativity, because why settle for a home that feels dull when you can create one that wraps you in warmth every time you walk in? According to my experience, the perfect winter setup always blends layered textures, moody colors, thoughtful lighting, and pieces that actually make your life easier.

I recommend experimenting with these trends one step at a time. Try a new scent, add a dramatic accent color, or bring in a few natural elements. Ever noticed how one small change can shift an entire room’s energy? That’s the magic of winter decorating. So have fun with it, trust your instincts, and let your space reflect the kind of cozy calm you want all season long.

Top 10 Trending Mirror Designing Ideas For Bathroom

Introduction

Looking to upgrade your bathroom without tearing down a wall or selling a kidney? 10 Trending Mirror Designing Ideas For Bathroom will give you simple, high-impact choices that transform looks and function. in my opinion, the right mirror does more than reflect your face; it defines the vibe, improves light, and often hides sins like poor layout or tiny vanities. Curious which mirror will make your bathroom sing? Let’s get into it.

Why Mirror Design Actually Matters

Mirrors serve more than one job. They amplify light, create depth, and anchor the vanity zone. According to my experience, a well-chosen mirror can make a cramped bathroom feel airy or turn a basic vanity into a boutique-style focal point. Want proof? I swapped an old medicine cabinet for a backlit mirror in a rental bathroom and watched the space look brighter and more expensive—no renovation lottery required.

Why care about trends? Because trends show what works in real homes right now. Do you want a style that looks dated next year or one that lasts? I recommend picking a design that blends trend and timelessness.


Mirror Idea 1 — Backlit LED Mirrors (My Go-To)

What I like about them

I love backlit LED mirrors because they combine function and mood. They give even, flattering light for shaving or makeup and create a soft glow that makes the bathroom feel spa-like. in my opinion, they offer the best bang for your budget when you want luxury vibes without huge cost.

Quick features to look for

  • Dimmable LEDs for flexible ambiance.
  • Color temperature control so you can switch from warm to daylight.
  • Anti-fog function if you hate wiping the mirror after every shower.

Tips from my experience

I installed a dimmable backlit mirror in a small guest bath and paired it with recessed lights. i prefer the mirror as the primary light for the vanity because it reduces shadows on the face. If your vanity sits under a sloped ceiling, mount the mirror slightly higher to keep the light even.


Mirror Idea 2 — Frameless Oversized Mirrors (Bold and Simple)

Why they work

Oversized frameless mirrors create instant depth. They make small bathrooms feel larger and keep lines clean. in my opinion, you get modern minimalism and maximum impact with one piece of glass.

Installation and style tips

  • Choose a mirror that spans the vanity wall for a seamless look.
  • Use polished edges for a refined finish.
  • Consider a thick glass (at least 1/4 inch) to avoid flexing.

When to pick this

Go frameless when your bathroom has clean tiles and simple fixtures. i recommend this when you want an uncluttered look that still feels upscale. I once recommended a full-width frameless mirror for a client who had awkwardly placed lights; the mirror solved the layout problem by reflecting light into the darker zones.


Mirror Idea 3 — Round and Organic Shapes (Soothing Curves)

The charm of curves

Round mirrors add softness and break rigid lines. They create a friendly focal point and pair especially well with vanities that have straight lines. Ever hung a round mirror and felt the room relax a little? Yeah, me too.

Design pairings

  • Wood frames add warmth and suit Scandinavian or rustic bathrooms.
  • Metal frames give a modern, industrial edge.
  • Clustered rounds (two or three different sizes) create an intentional gallery feel.

Practical notes

  • Proportion matters. Pick a mirror that covers about two thirds of the vanity height.
  • Hang a round mirror slightly lower than a rectangular one so your reflection sits comfortably in frame.

Mirror Idea 4 — Smart Mirrors With Built-In Tech

Why I think they’re worth the hype

I know smart mirrors sound a bit extra, but trust me, they actually make your bathroom routine smoother. In my opinion, a smart mirror adds convenience without forcing you to overhaul your whole space. Ever tried checking the weather while brushing your teeth without dropping your phone into the sink? A smart mirror solves that beautifully.

Features I recommend

When choosing one, look for:

  • Touch controls that let you adjust brightness.
  • Bluetooth speakers for music or podcasts.
  • Time and temperature display so you don’t run late again.
  • Anti-fog technology that keeps your reflection clear even after a hot shower.

Experience-based advice

I helped a friend install a smart mirror in his small apartment bathroom, and the convenience surprised him. He didn’t expect the built-in lights to replace his overhead fixture completely, but they did. I like how smart mirrors elevate even the plainest bathrooms with zero clutter.


Mirror Idea 5 — Built-In Storage Mirrors (Stylish and Practical)

Why storage mirrors make sense

If your bathroom constantly looks like a skincare store exploded on the counter, you’ll love this idea. According to my experience, storage mirrors save space and make organization painless. They also blend function with clean aesthetics, something I always aim for in small or shared bathrooms.

Types to consider

  • Recessed medicine cabinets for a flush, seamless look.
  • Floating storage mirrors for modern minimalism.
  • Mirrored side cabinets if you need extra storage without widening the vanity.

My personal tip

I recommend choosing a storage mirror with adjustable shelves. You have no idea how many tall serum bottles and hair-care sprays ruin fixed-shelf layouts. I once worked with a client whose cabinet couldn’t fit her toner bottle, and the frustration was way too real.


Mirror Idea 6 — Double Mirrors for Double Vanities

The aesthetic power of symmetry

Double mirrors add balance and structure. In my opinion, two separate mirrors look cleaner and more intentional than one giant slab. They highlight each sink area, which creates a beautifully composed vanity wall.

How to style them

  • Choose mirrors that match but don’t overpower your vanity.
  • Center each mirror perfectly over its respective sink.
  • Add individual sconces on each side for symmetrical lighting.

Practical insights

I prefer double mirrors when the vanity is wider than five feet. Anything smaller looks cramped. I once installed mismatched mirrors for a bold, artsy look, and surprisingly, the asymmetry worked because the frames complemented each other. So yes, you can get playful if you feel brave enough.


Mirror Idea 7 — Statement Framed Mirrors

Why frames matter more than you think

Frames add personality faster than new tiles or faucets. A bold frame gives your bathroom character, especially if your walls and vanity stay neutral. Ever seen a bathroom that feels too clean, almost sterile? A framed mirror fixes that instantly.

Frame style ideas

  • Wooden frames for warmth and chic earthy tones.
  • Gold or brass metal frames for a touch of luxury.
  • Matte black frames for modern simplicity.
  • Carved or textured frames if you want a dramatic accent.

What I prefer

I like mixing materials. For example, a wooden vanity with a metal-framed mirror creates a layered, curated aesthetic. According to my experience, contrast always makes a bathroom feel designed, not accidental.

Mirror Idea 8 — Arched Mirrors for Soft Elegance

Why arched mirrors feel instantly luxurious

Arched mirrors add a graceful, almost architectural feeling to the bathroom. In my opinion, the curve softens sharp tiles, straight vanities, and the overall rectangular layout most bathrooms have. Ever notice how an arch makes a space feel more curated? That’s the magic at work.

Where arched mirrors work best

  • In bathrooms with tall ceilings to emphasize height.
  • Above minimalist vanities for a classy contrast.
  • In narrow bathrooms where softer lines reduce visual stiffness.

My design tip

I prefer arched mirrors with slim metal frames. They feel modern without losing their timeless charm. I installed one for a client who hated the boxy look of her small guest bathroom, and the change surprised her. The arch made the entire space feel intentional and airy.


Mirror Idea 9 — Vintage and Antique Mirrors

The charm of old-world detail

A vintage or antique mirror brings personality you just can’t fake. According to my experience, these mirrors add warmth and storytelling value to bathrooms that lack character. Have you ever walked into a space and immediately felt like it had history? That’s the effect vintage mirrors create.

Styles to consider

  • Ornate gold frames for a royal touch.
  • Distressed wood frames for rustic charm.
  • Baroque-inspired designs if you love dramatic elegance.
  • Thin brass frames for subtle antique appeal.

Personal recommendation

I recommend using a vintage mirror as the statement piece and keeping the rest of the bathroom simple. I once paired an antique French-style mirror with a very modern vanity, and the contrast looked incredibly stylish. If your bathroom feels too predictable, a vintage mirror fixes that fast.


Mirror Idea 10 — Pivot Mirrors for Flexible Angles

Why pivot mirrors are underrated

Pivot mirrors offer adjustable angles, which makes them both functional and stylish. In my opinion, they work especially well in shared bathrooms where people have different height preferences. Ever tilted a mirror slightly and got instantly better lighting? That’s why I love them.

Where they shine

  • Small powder rooms that need flexible angles.
  • Bathrooms with limited wall space.
  • Vanity areas where you want depth without using a giant mirror.

Tips from my experience

I prefer pivot mirrors with metal hardware because they add subtle industrial vibes. If your wall tiles have strong patterns, pivot mirrors help break the repetition without overwhelming the space. I installed one in a compact apartment bathroom, and the ability to angle it made the room feel more dynamic and less flat.


Bonus Idea — Layered Mirror Walls For Bold Creativity

Why I included this idea

I know the title says ten ideas, but consider this a friendly extra. Layered mirror walls create an artistic, dimensional look using multiple mirrors of different shapes. I like suggesting this to homeowners who enjoy playful, gallery-like designs.

When to use layered mirrors

  • In boho, eclectic, or creative interiors.
  • When you want your bathroom to feel unique rather than uniform.
  • If you love the idea of collecting mirrors over time.

A personal take

This idea isn’t for perfectionists, and that’s okay. According to my experience, people who embrace this look often enjoy the freedom it brings. No one expects symmetry here, which can be refreshing. It’s the one style where you get to break the rules without apology.

Conclusion

Choosing the right mirror for your bathroom shouldn’t feel like a renovation-level crisis. With these 10 Trending Mirror Designing Ideas For Bathroom, you now have a mix of stylish, practical, and personality-driven options that actually work in real homes. In my opinion, mirrors are the easiest way to transform your bathroom without emptying your wallet or calling a contractor who shows up four hours late.

Each idea offers something different. Backlit mirrors make your bathroom glow like a spa. Oversized frameless mirrors expand the space. Smart mirrors make you feel a little futuristic, and vintage mirrors bring character that no modern frame can fake. Which one wins? The one that matches your style, your space, and your daily routine.

If you want a simple takeaway, let me give you the advice I give clients all the time.
Pick a mirror that does three things:

  • Fits your bathroom size
  • Matches your design personality
  • Improves functionality without clutter

When you choose based on these three, you can’t really go wrong. According to my experience, the best mirror is the one that makes you smile every time you flip the light on in the morning. Even better if it hides those dark circles you pretend aren’t there.

So take a minute and imagine the vibe you want. Do you prefer soft round edges, glam frames, tech-forward lighting, or something bold and sculptural? Your bathroom mirror sets the tone more than you think. And let’s be honest, a gorgeous mirror makes even the most chaotic bathroom look designed on purpose.

If you’re ready to upgrade, start with the idea that excited you most. Trust your instincts. And if your instinct tells you to scroll back up and look again, well, that’s perfectly normal too.

Happy decorating, and may your bathroom reflect the best version of your style.